I have always thought that the market is full of a lot of clever knitting, crochet and craft supplies that might be nice to have but are utterly pointless or are things that you can clearly do without. I know that there are plenty of people who would disagree with me on this point, but one example I have always felt strongly about is stitch markers. I have seen knitters spend HUGE amounts of money on stitch markers made with hand crafted glass beads. They are pretty, they are nice to work with, but if you’re like me, it’s hard to justify spending up to $45 USD (yes, I saw a pair on ETSY for that amount) for something you can use a piece of scrap thread for.
This is going to sound really odd, but until my BSJ project, I used paper clips as stitch markers. They always did the trick and they are cheap, easy to find in a junk drawer if you need an extra, and you don’t cry if you lose one. When doing the BSJ project, I used an alpaca that was constantly getting stuck on the outside loop of the paperclips and finally gave in to the idea of getting some real stitch markers. I personally think the plastic ones you can buy are not really attractive to look at or hold in your hand to work and I have an issue with the expensive one (see rant above) so what’s a girl to do… make your own.
How I made my own stitch markers
Materials Needed
Straight pins with stopper used in jewelry making. These are in silver and have a rounded ball ending, but you can also find them with other finishes and endings like flat stopper or round loop endings.

Toggle clasps in a size appropriate to your knitting needles. Again, these come in countless styles and finishes. Pick a size that gives a good fit to your needles and consider buying several different sizes if you do a lot of different types of projects. You’ll only be using the loop end of the toggle clasp, so the look and style of the post is irrelevant.

Beads after your own taste. Consider what you like and take it from there. The choice of beads is endless, but picking some sort of larger bead as a focal point is a smart idea.
I chose to use two different color combinations when I assembled my markers. The idea behind this was so that I could mark increases/decreases or added/dropped stitches differently as patterns require (for ex: socks).

Flat needle nose pliers to wrap the pin around itself. You can use normal needle nose pliers, but you risk the ridges on the inside of the pliers leaving ridge marks on the finished marker. Just a warning.
Assembly
This is a lot easier than you might think – here’s a step by step run down.
1. String the beads on the pin.

2. Sting the toggle clasp ring on the pin and bend the pin.
3. Using a pair of flat needle nose pliers, wrap the bead-less part of the post around the post. You can do this by pinching the loop and twisting the pin with the pliers. I can’t take a picture of this while doing it myself (not until modern science can grow me a third arm…) so here is a drawing:

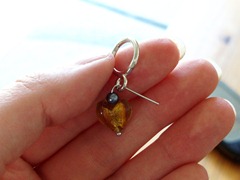
If you twisted it right, it should look like this:

You still with me??
4. Using the wire nippers on your pliers (or a pair of wire cutters as shown below), nip off any excess pin not included in the wrap. Not doing so will leave you with a sharp metal bit that can at best be uncomfortable to work with or at worst rip up your knitting or hand!

So there you have stitch markers. You can make them yourself and only your own creativity and budget can set the limit as to what you can create

No comments:
Post a Comment